Compose
A plugin for composing RGB images from constituent monochrome images.
Plugin Type: Local
Compose is a local plugin, which means it is associated with a
channel. An instance can be opened for each channel.
Usage
Start the Compose plugin from the “Operation->RGB” (below) or
“Plugins->RGB” (above) menu. The tab should show up under the
“Dialogs” tab in the viewer to the right as “IMAGE:Compose”.
Select the kind of composition you want to make from the “Compose Type” drop down: “RGB” for composing three monochrome images into a color image, “Alpha” to compose a series of images as layers with different alpha values for each layer.
Press “New Image” to start composing a new image.
*For RGB composition*
Drag your three constituent images that will make up the R, G, and B planes to the “Preview” window – drag them in the order R (red), G (green), and B (blue). Alternatively, you can load the images into the channel viewer one by one and after each one pressing “Insert from Channel” (similarly, do these in the order of R, G, and B).
In the plugin GUI, the R, G, and B images should show up as three slider controls in the “Layers” area of the plugin, and the Preview should show a low resolution version of how the composite image looks with the sliders set.
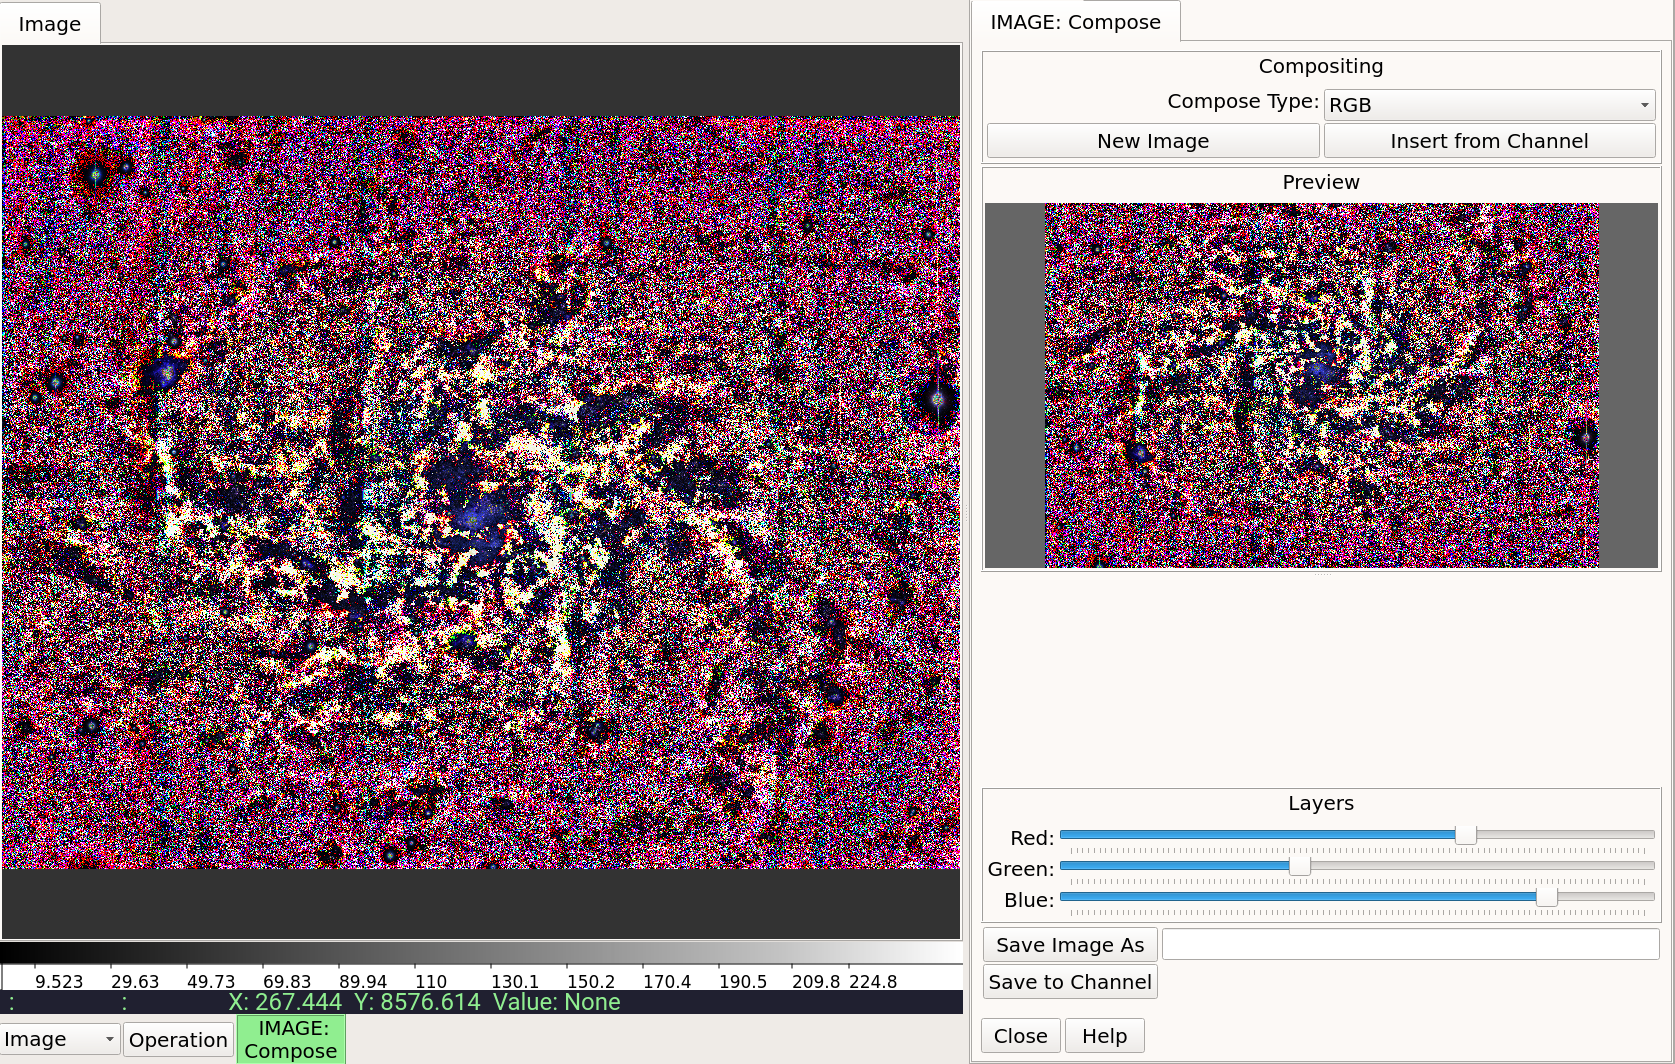
Composing an RGB Image.
Play with the alpha levels of each layer using the sliders in the
Composeplugin; as you adjust a slider the preview image should update.When you see something you like, you can save it to a file using the “Save As” button (use “jpeg” or “png” as the file extension), or insert it into the channel using the “Save to Channel” button.
*For Alpha composition*
For Alpha-type composition the images are just combined in the order shown in the stack, with Layer 0 being the bottom layer, and successive layers stacked on top. Each layer’s alpha level is adjustible by a slider in the same manner as discussed above.
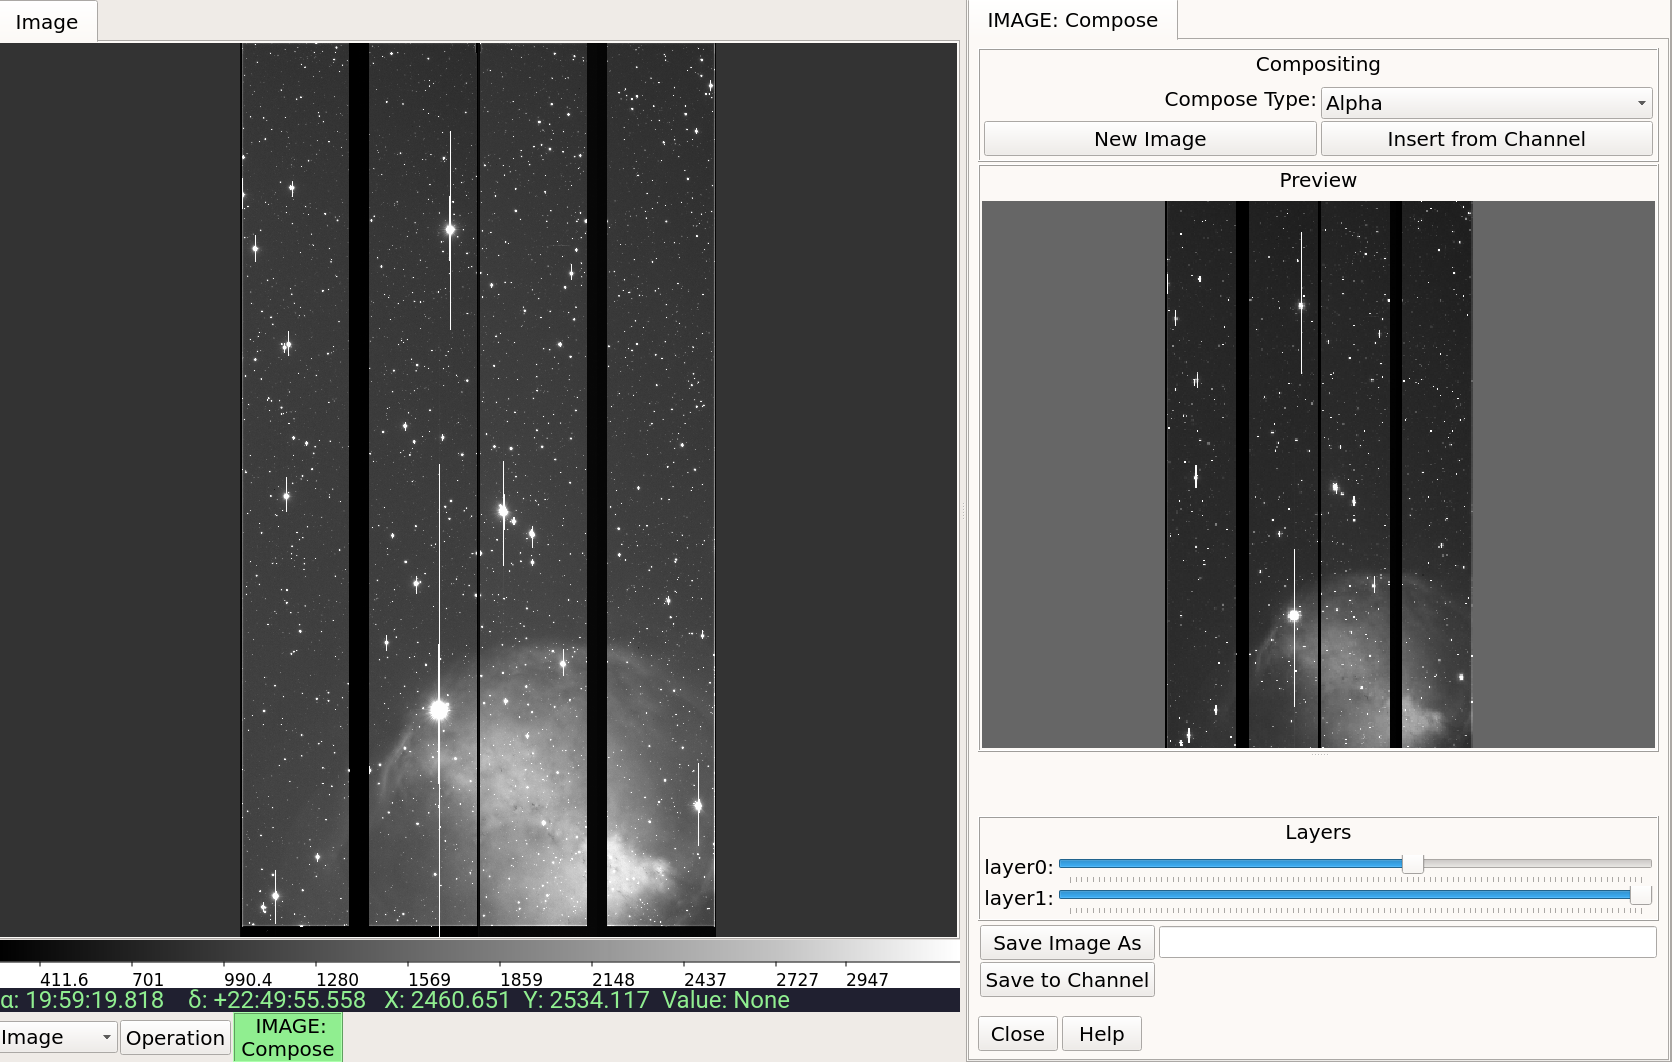
Alpha-composing an image.
Drag your N constituent images that will make up the layers to the “Preview” window, or load the images into the channel viewer one by one and after each one pressing “Insert from Channel” (the first image will be at the bottom of the stack–layer 0).
Play with the alpha levels of each layer using the sliders in the
Composeplugin; as you adjust a slider the preview image should update.When you see something you like, you can save it to a file using the “Save As” button (use “fits” as the file extension), or insert it into the channel using the “Save to Channel” button.
*General Notes*
The preview window is just a ginga widget, so all the usual bindings apply; you can set color maps, cut levels, etc. with the mouse and key bindings.