TVMark
Mark points from file (non-interative mode) on an image.
Plugin Type: Local
TVMark is a local plugin, which means it is associated with a
channel. An instance can be opened for each channel.
Usage
This plugin allows non-interactive marking of points of interest by
reading in a file containing a table with RA and DEC positions of those points.
Any text or FITS table file that can be read by astropy.table is acceptable
but user must define the column names correctly in the plugin configuration
file (see below).
An attempt will be made to convert RA and DEC values to degrees.
If the unit conversion fails, they will be assumed to be in degrees already.
Alternately, if the file has columns containing the direct pixel locations, you can read these columns instead by unchecking the “Use RADEC” box. Again, the column names must be correctly defined in the plugin configuration file (see below). Pixel values can be 0- or 1-indexed (i.e., whether the first pixel is 0 or 1) and is configurable (see below). This is useful when you want to mark the physical pixels regardless of WCS (e.g., marking hot pixels on a detector). RA and DEC will still be displayed if the image has WCS information but they will not affect the markings.
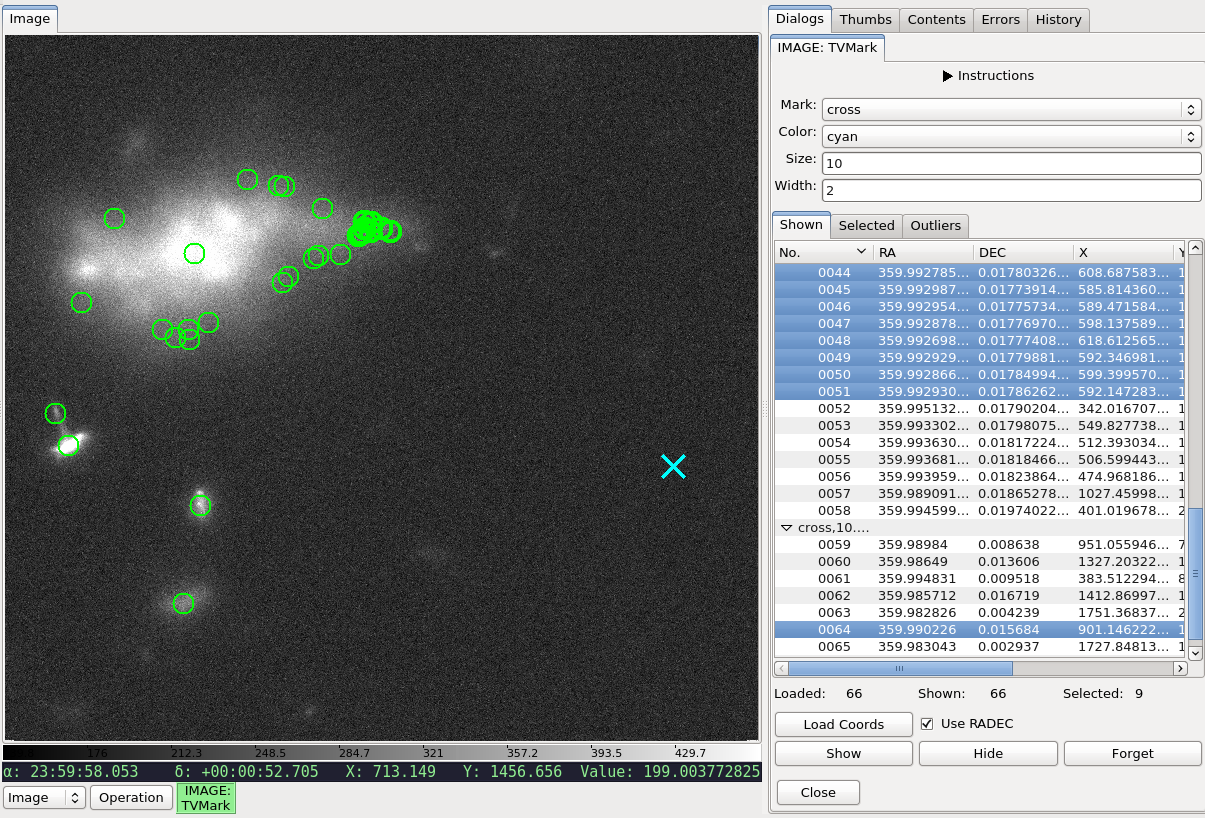
To mark different groups (e.g., displaying galaxies as green circles and background as cyan crosses, as shown above):
Select green circle from the drop-down menus. Alternately, enter desired size or width.
Make sure “Use RADEC” box is checked, if applicable.
Using “Load Coords” button, load the file containing RA and DEC (or X and Y) positions for galaxies only.
Repeat Step 1 but now select cyan cross from the drop-down menus.
Repeat Step 2 but choose the file containing background positions only.
Selecting an entry (or multiple entries) from the table listing will highlight the marking(s) on the image. The highlight uses the same shape and color, but a slightly thicker line.
You can also highlight all the markings within a region both on the image and the table listing by drawing a rectangle on the image while this plugin is active.
Pressing the “Hide” button will hide the markings but does not clear the plugin’s memory; That is, when you press “Show”, the same markings will reappear on the same image. However, pressing “Forget” will clear the markings both from display and memory; That is, you will need to reload your file(s) to recreate the markings.
To redraw the same positions with different marking parameters, press “Forget” and repeat the steps above, as necessary. However, if you simply wish to change the line width (thickness), pressing “Hide” and then “Show” after you entered the new width value will suffice.
If images of very different pointings/dimensions are displayed in the same channel, markings that belong to one image but fall outside another will not appear in the latter.
To create a table that this plugin can read, one can use results from
the Pick plugin, in addition to creating a table by hand, using
astropy.table, etc.
Used together with TVMask, you can overlay both point sources and masked
regions in Ginga.